Showing posts with label Canning and Preserving. Show all posts

The Healthiest (and Cheapest!) Way to Dry Herbs

It's been a little quiet here on the blog this summer but I just wanted to jump on and share with you how I am preserving all the fresh herbs I have coming out of my garden right now.

My Sage is going crazy!
There are basically 2 ways to preserve fresh herbs. Historically, they have been dried. The advantage to this is that they shrink to a least 1/3 their fresh size and a fraction of their weight and will keep for a very long time.

Another option I've shown you is how to preserve fresh herbs by freezing them in ice-cubes. This is a great option if you really want that fresh from the garden taste in your food (and have room in your freezer!). I think it works best with parsley or basil, even cilantro would be good. Those herbs are frequently thrown in at the end of a meal for a little pop of flavor.

Sturdier herbs like sage, rosemary and oregano are usually added at the beginning of cooking and don't need to be fresh. Basil can be added like that as well so these ones aren't necessary to keep fresh and are perfect for dehydrating.

Dehydrating just means drying out and getting the moisture out of them so they won't mold during storage. Some people use dehydrators or ovens to dehydrate their herbs but you really don't need anything fancy and the way I'm going to show you is actually the healthiest because it keeps the most nutrients in tact. It is also the cheapest. Air drying.

Yep, we are going to do this the old fashioned way. There are just a few things you want to keep in mind.
  • Start with washed herbs. Once they are dried, you won't have the chance to wash them before you use them, so any dirt or other particles that are on there when they are picked will go straight into your food. 
  • Dry as much as you can by patting with a towel or running through a salad spinner. This will help lesson the drying time.
  • Don't place in direct sunlight. Just as we turn the oven to the lowest temperature possible when dehydrating to preserve the nutrients from being affected by the heat and cooking out, we don't want the sun to do that either. A family friend grew up in Switzerland in the 1940's and they would actually take their herbs (and green beans!) up to the attic to dehydrate in the dry, motionless, hot air. 
  • Find a place that is not drafty. You might think that having something blowing softly on your herbs would help them dry faster, and it is true, but it will also dry out the essential oils in the leaves making your herbs flavorless. 
  • Although you don't want air blowing across your herbs,  you do want there to be enough space for air to travel around and through so you don't have dense little pickets of herbs that don't dry out all the way and end up molding a ruining the whole batch. 

  • Here is my sage. It grew really heavily and the leaves are very thick too, so I made sure to separate the stems and only bunch 4-5 together to make sure it wasn't too dense. If you live in a more humid space, you may need to just do 1-2. Alternatively, you can also pick the leaves off the stems and air dry them on a drying rack used in baking. Just flip the leaves over a few times a day when you walk by to make sure none are sticking together. This is some basil my friend gave me. Can you believe how big the leaves are? They're longer than my hand! I love having dried basil on hand. It is essential in my favorite homemade Greek Salad Dressing. 
  • Next, all you need is time. A couple days. You will know when they are ready when they are completely dry and brittle. They should audibly crisp and snap when you bend them. If there is any bending without it breaking, it isn't dry enough yet.
  • Last just find an airtight container and pack it full leaving as little airspace as you can.
  • These dried herbs should last you well past next year's harvest (if you can keep them that long)
Sage Leaf Tea

I love using my dried sage with my Thanksgiving turkey and for healing herbal tea. Sage is most well-known for its benefits to the immune and digestive system as well as anti-inflamatory properties which help to regulated blood pressure, lower cholesterol and blood clots.

Try it, it's yummy.

XO,

Tiara
-The Provident Princess


Sour Cherry Jam Recipe

Hooray! Can I just tell you how excited I am now that it is cherry season? It means it is the beginning of all my summer and fall canning. And I've got so much planned that I am excited to share with you. First up is Sour Cherry Jam. Have you ever heard of Sour Cherries or Tart Cherries before? They are not easily found in stores and most often at food stands or farmers' markets for a very limited time at the beginning of Cherry Season. Just like their name says, they are sour. They are beautifully bright red and are best used in another creation like jams, syrups, ice cream topping, pies, or dried and not really eaten as a table fruit. You can find dried tart cherries in the grocery stores for about $5.99/lb. At least that's how much they are in the health section of my local Kroger store. 

In Utah, the best sour cherry variety is Montmorency and it is the most common tart cherry grown in the US. It is heary and can withstand more front than sweet varieties because it blooms latest in the spring avoiding late frosts. 

Tart Cherries are perfect for pies or crumbles because they really let you control the sweetness factor  and they hold their shape wonderfully when cooked. These are what are standard for commerical pie filling cherries.  Once you find a source for Sour Cherries you'll be so excited finding ways to use them up. If you need time to decide though, pit them and freeze them because they won't last long fresh and actually really hold up to freezing well.

I happen to have found an old neighbor with a Sour Cherry tree in his yard. I was driving my girls over to a friend's house and I looked out the car window at this tree we were driving by and thought "that looks like a cherry tree" so of course I had to go have a look. Yes I am that type of person. I noticed that the cherries were quite a bit smaller than other cherries and very bright, shiny red so I figured I had just found one of these rare cherry trees. I knocked on the person's door and he was very happy to let me come back and pick as much as I wanted. I hauled my girls back there the next day and we picked 3 grocery bags full and hadn't even made a dent in the tree!

We returned all hot and sweaty from being out in the sun and sure enough when we bit in to one we found out they were tart cherries!

I thought about all the ways I wanted to use them up and we tried Sour Cherry Jam, Sour Cherry Syrup (awesome in my Tart Cherry Lime Mocktails!) and I dried a whole bunch for the kids. 

Making Jam is so easy. Every recipe is different depending on the type of pectin you use. I like the low sugar one and feel like it is plenty sweet. You can even find a no sugar fruit pectin as well. Look for a recipe that has 3 cups of sugar or less for 4 cups of fruit. 

DIRECTIONS  ___________________________________________________________________
First you want to wash, pit and chop the sour cherries and measure the EXACT amount on your pectin box instructions into a sauce pan. (Making jam really is a science so you have to follow the amounts exactly or your jam won't set)

2.  Add water and pectin package into fruit and bring mixture to a full rolling boil on high heat,  which means that it doesn't stop bubbling when you stir it. And stir constantly. (You can also add a 1/2 tsp butter to reduce foaming if you want)

3. As soon as it hits a rolling boil, pour in the sugar called for all at once and return to a rolling boil. Time for 1 minute at a full rolling boil on high heat stirring constantly then remove from heat and skim off any foam. 

4. Ladle quickly into clean glass jars. I like to use the 6 oz jars. You only need 1/8 inch of headspace. Wipe jar rims  and cover with lid and screw on the band to finger tight.

5. Place onto water bath canner rack and lower into the water to cover jars by 1-2 inches. If you need more water, have some boiling water waiting nearby. 

6. Cover the canner and bring water to a gentle boil. Process Sour Cherry Jam 10 minutes (add 5 minutes for elevations 1,0001-3000 ft and 10 minutes if your are at elevation 3,001-6,000 ft above sea level.)

7. Remove jars after alloted time and place upright. (Some people turn jars upside down but you shouldn't do this). Just set on a towel and let it cool completely for at least 24 hours. Check seals by pressing middle of lid with finger. If the lid springs back, it means it is not sealed and you can either refridgerate and use immediately or you can reprocess it again with a new lid if you have any other batches of jam to do. 

That's it. It really goes so quickly. One of the best ways we love enjoying our Sour Cherry Jam is by swirling it through a little bit of plain yogurt. In fact, that was one of my tricks to slowly get my babies to start eating plain yogurt.

As an aside, I remember being an exchange student in Germany and trying to buy yogurt and being so confused why it was so sour. I didn't realize what real yogurt was supposed to taste like. Ours is like melted ice cream in the states! Slowly I got used to it and now I love it. If you want to start weaning your family off the high sugar yogurts,  start with 1 tsp of Jam/ Jelly (that is only 4 grams of sugar) and compared to the amount of sugar that is dumped into store-bought yogurt, it is infinitely better. Then slowly I would add less and less til they would eat just plain yogurt with berries mixed in. Try it, it works! 

I hope you find yourself lucky enough to snag some tart cherries this season. There are some U-pick farms as well as farmers' markets where they will be available for about 2 weeks in July.

Happy Canning!

Tiara
- The Provident Princess


Sour Cherry Lime Summer Mocktail


Here at Provident Princess we love enjoying seasonal foods and the easiest time to do that is definitely during summer with the abundance of crop varieties and farmers' markets popping up all over. Right now we are celebrating all things cherry. Summer always seems to include all sorts of fun drinks. And for all of you non-drinkers out there, I have the perfect Sour Cherry Lime Mocktail to share with you!  It is supper easy and like all recipes you will find here, this Cherry Lime Mocktail has the simplest and most whole ingredients. I'm not into a lot of fuss. When we buy food in season, the flavors don't need a lot of help to shine.

I was coming back from dropping one of my daughters off at a friends and I noticed a house with a beautiful cherry tree out back which didn't look touched or taken care of at all. So what did I do? I pulled over and knocked on their door of course. The nicest man answered and assured me that I was welcome to take as many cherries as I wanted.

Honestly, I know many people feel intimidated by knocking on a stranger's door asking if they are going to use their fruit; but most people are relieved to give it away. They are usually not the ones who planted the trees and don't really know what to do or can't use all the food it produces. Many people have acted like I was the one who was doing them a favor by taking it off their hands so they wouldn't have the mess to pick up later when it all fell unused to the ground. So if you ever have the chance, Do. It.

I showed back up later that day and we picked and picked and picked. It was so hot. We stuck with it until we had about 3 grocery bags half full and you couldn't even tell where on the tree we were picking because there were still so many cherries on there.

We got back home and were in for a huge surprise. The cherries weren't pie cherries like I had thought. They were Sour Cherries! Instead of the Cherry Pie filling I'd envisioned making for a decadent cheesecake, I had to think of how else to use this sour cherry harvest.

Have you seen that Cherry Juice Costco is sampling at Costco? They are touting it like it's the next pomegranate juice because of its high volume of anti-oxidants . It's made from this type of cherry! (And it is delicious btw, 2 thumbs up from the toddlers.)

Since the cherries are so tart, you can't really eat them plain, so we had to get to work washing and  pitting. My girls had a blast working the cherry pitter and really learned how to get in the groove.

So what can you do with sour cherries? They dehydrate wonderfully. Dried sour cherries at the store sell for 5.99/lb! That was by far our favorite method to eat these delicious cherries. We also made Sour Cherry Jam which I couldn't eat all the time but it is fun to have in the rotation. We also made Sour Cherry Syrup for pancakes and waffles.

I'm not a soda drinker. I've just never liked it, but my children and husband do. So every now and then I will buy some sparkling water to add to some juice to make it a little special. Sparkling water is so much better than soda. No sweeteners, added sodium or caffeine buzzes for the kids.

I had a box of La Croix Sparkling Lime Water left-over from one of these purchases and thought it would be the perfect vehicle to try our new Sour Cherry Syrup we canned. Let me tell you. This drink is like summer in a cup.


Ingredients________________________________________________________________________
3 (12 oz) cans of La Croix Sparkling Lime Water
3/4 cup Sour Cherry Syrup (you can find cherry syrup in the store too by the drink mixes if you don't               have your own homemade)
Slices of fresh limes and cucumbers for garnish (1-2 per glass)

Directions_________________________________________________________________________
Fill 4 Tumblers filled with cubed ice. In a pitcher combine sparkling lime water and cherry syrup. Add the cucumbers to the pitcher to start to infuse its flavor into the drink. You can leave it like this in the fridge until you are ready to serve. Stir to combine syrup and pour into tumblers of ice. Garnish with a lime slice and enjoy immediately.


Perfect for a summer evening spent outdoors.  I also like to garnish the serving platter with limes and sweet cherries so guests know what flavors to expect. I love how this recipe takes so little effort but really gives such an elevated look to any get-together.

Let me know in the comments if you try this recipe. And if you are looking for just a single drink for yourself to enjoy, 2 Tablespoons of the cherry syrup to 1/2 cup of sparkling lime water. You're Welcome.

Cheers,

PP

Strawberry Chia Seed Freezer Jam

I am loving summer already. Yes, it's fun having the kids home from school and having tons of fun and crazy adventures; but what I am really excited about is my garden! I transplanted my strawberries last fall because they weren't doing great where they were and now they are producing abundantly. So in honor of my first strawberry harvest this season, I am so excited to share my favorite strawberry freezer jam recipe with you all.


It is so healthy. Made with low sugar and chia seeds for extra protein and fiber. It is delicious on toast. or my oldest loves it on waffles instead of syrup. I also mix it into plain whole milk yogurt for my babies.

This recipe is so fast and such an easy way to save money on organic jam. And if you have been interested in canning but didn’t know where to start, this is the perfect gateway into the world of canning and preserving. I know it can seem intimidating, but try this freezer jam recipe first. It is so easy and fast, and will be the perfect confidence builder to try one of the many other step-by-step recipes I have on the blog. 

Read on for my super easy, low sugar, Strawberry Chia Seed Freezer Jam and stay tuned on the blog for many more healthy, plant-based, low cost, real food recipes and ideas.

Strawberry Chia Seed Freezer Jam
Ingredients:
·        3 cups strawberries, chopped
·        ¼ cup non-gmo sugar or honey -(I know a lot of people love to use honey because of its health benefits but it isn’t worth it to use in this recipe. This recipe gets heated, just for a bit, but it is enough to kill any of the beneficial things in honey. So I use cane sugar and save my raw honey for when it will make a difference. It is non-gmo and way less expensive than raw honey.
·        2 Tbsp ground chia seeds- you can totally use chia seeds whole but I just don’t like the texture or look of all the seeds so I grind mine. About 1 ½ Tbsp chia seeds will make 2 Tbsp ground. Or just use 2 Tbsp whole.
·        1 Tbsp lemon juice- this helps retain color and texture
2 half pint canning jars

Directions     

1. Combine the sugar and ground chia seeds in a sauce pan and stir til equally distributed. (if you are using whole seeds don’t worry about adding them until you add the lemon at the end. With ground chia seeds it helps to add them to other dry ingredients or they will clump and start to gel immediately after being added to a liquid and it is hard to incorporate them evenly. 

2. Add the chopped strawberries to the sugar and chia seeds. Stir around and let sit for 10 minutes. The sugar will macerate the strawberries helping to release their juices making them break up easier.

 3. Turn on heat to medium and gently mash the berries until they break up a little and reach your desired texture. I like some chunks but mostly spreadable.

4. Bring to a boil and simmer for 15-20 minutes until berries are soft.

5. Take off heat and add lemon juice and whole chia seeds if using. Stir til incorporated evenly. 

6.     Pour into half-pint canning jars and refrigerate for 24 hours then move to freezer. Take one out and enjoy over toast, pancakes or yogurt. 

Cheers, 

PP

How to Make Beef Bone Broth

So we all know by now how nutritious and good for us bone broth is. Even the major food brands all have their own cartons of bone broth on the shelves. I'm glad that more healthful options are being offered these days and buy a few cartons here and there for convenience. But, when I have the option, I love to make my easy homemade bone broth in a crock-pot.

Grocery store bone broth can't hold a candle to it in the health department. Do you know how I know? A good bone broth will turn into almost a jelly when it cools. That's how you know it is full of collagen. Collagen is a power house in the health department. It helps reduce joint pain and strengthen bones, improves and strengthens hair and nails, helps improve liver and gut health including detoxification among so many other things.

My sister-in-law and I went in on part of a grass-fed cow together from a local farmer here in Utah. Best way to save on grass-fed/pasture-raised meat by the way. I've been loving all the different cuts of meat that I don't usually buy from the store since they are usually way more expensive than just grass-fed ground beef. But one of the things I was most excited about was having a bunch of soup bones to make bone broth with. When you buy a cow, they ask if you want the bones. Say "YES!" The broth you get from bones is rich, velvety and chock full of the most essential vitamins and minerals that are so lacking in our diets. I just throw my soup bones in my deep freeze and take out a package or two at a time when I want to make some broth.

And making homemade bone broth couldn't be easier. You can obviously use a stock pot on the stove with this recipe too. I just love the easiness and worry free setting and leaving of crock-pots.


Start with about 2 pounds of soup bones. Ideally, half should be joint bones because they will contribute the most collagen to your broth.  Lay them out on a sheet pan covered with parchment paper. Anything to make clean up shorter, right? Now salt and pepper them really well. I like to use my kosher salt for things like this.


Next, you'll want to brown the bones in a pre-heated 350 degree oven for about 30 minutes, turning at the half way mark. This really helps develop the flavor of the broth so much.


While your bones are browning, it's time to assemble the rest of the ingredients. I love using the inside stalks of my celery for stock. The leaves actually have so much flavor and they are a part of the plant that we don't usually eat, so I love to make sure I use them all up. When I am buying organic produce, I like to make sure I use the whole plant. You can read more about how I save money on our organic and grass-fed foods here and here.  Another thing I like about making stock is that you it helps to clean out the fridge and use up anything that is getting a little old and maybe isn't in its prime texture wise. You can see my carrots are on their last leg too. They were still perfectly crunchy but starting to sprout. Just wash your veggies, you don't need to work about peeling or chopping.

Dehydrated Onions
Start to put your veggies in the crock-pot. You make have to break your carrots in half to get them to fit. Now I'm going to share one of my favorite things to use in my broths. Dehydrated onions. If you don't have any then by all means just halve an onion and throw that in. But, once a year I get a 25 pound bag of onions for about 3 dollars! Obviously we can't get through that many onions before they would go bad so I dehydrate them.


I love them! Once, I also saw organic celery for .50 a bunch so I bought a ton of them and dehydrated them too. I love to throw them in my soups, chilis and bone broths.

Ok, so back to the broth.


Add a bay leaf or two. You can also put in a few black peppercorns. No more than 5.


Once your bones are browned, take them out of the oven and nestle into your veggies and cover with water. You want your bones covered at all time. Pour in 2 Tablespoons of Apple Cider Vinegar and turn on the crock-pot for at least 8 hours but preferably 24. It takes a while to get all the goodness out of the bones. You can leave it to simmer for up to 72 hours but I find 24 is just fine. That way I can start it in the morning and by the next morning it is ready to use to make something for dinner that day. You'll want to cook it on high until it starts to simmer then turn it to low for the rest of the time. You don't want it boiling. It will destroy the collagen if it is cooked too high. A nice simmer is just right.


When it's done, strain it over a bowl so you can catch every. last. drop. I like to keep mine in mason jars. See that white layer on top? That is called tallow. You can cook with it, especially if you want a healthy, pasture-raised fat. Or in the olden days, because the fat was so hard, it takes a long time to melt, making it ideal for candle making.


If your broth looks like this when it is cooled, you did it just right. Look how jiggly it is. Perfect. Don't worry, it will liquefy when you warm it up again.

Now it's time to enjoy in all your favorite recipes. Stay tuned for my French Onion Soup recipe. And if you would like to learn how to make Turkey Bone Broth you can find the recipe here.

How to Make Apricot Nectar

I'm sure you've been wondering what I've been up to in my absence. I'll give you a hint.


I was an exchange student in Germany one summer and my host family always served a drink called Apricot Nectar at breakfast on the weekends. It was so delicious. I loved it but I've always thought it was just something they had in Europe. 

 The area where I live had a bumper crop of apricots this year and I was trying so hard to find something to make with them but all I could think of was apricot jam, fruit leather and dried apricots. We don't really go through that much jam and unfortunately I'd just bought a ton of dried apricots so didn't feel like making an more.

Luckily, one day found me at the house of an acquaintance when they were making Apricot Nectar and I had a flash back of how much I'd loved that stuff.

So I went right out and found some neighbors who didn't want their apricots. (I am the Provident Princess of course and nothing is more provident than free!)

Canning is always much more fun when you have help so my friend and I recruited our daughters for some of the grunt labor and got to work.

We washed, halved, and boiled the apricots in a little water for about 10 minutes. (you do not have to remove the skin.) We then used a juicer to run the apricots through and what came out was a nice, thick, nectar. 

NOTE: if you don't have a juicer you could use a high powered blender, sieve or foodmill to run the softened apricots through.

We sweetened each batch by juicing some pineapple (fresh or canned is fine) and honey. 

Ladled the nectar into jars and processed in a water bath canner for 20 minutes for pints and quarts.

15 min for sea level-1000ft
20 min for 1001-3000 ft
20 min for 3001-6000 ft
25 min for anything above 6000 ft.

We ended up making over 50 quarts! My family is loving it but surprisingly the way my girls like it most is warmed up a little. That is the way they first tasted it as we were cooking it all. 


How to Dehydrate Mushrooms

Dehydrating vegetables is such a great way to use up extra food. Dehydrated food loses 75-90 percent of its moisture making it a very effective way to store a large volume without needing too much room.  And drying mushrooms is one of the best vegetables to dehydrate because they keep their flavors so well.

You can dehydrate things using your oven. But with the cost of energy as high as it is, I don't think it's very economical to dry them like that.

On the other hand, dehydrators are very energy efficient and are an easy way to dehydrate big batches of food any time. Dried mushrooms can be used almost anywhere fresh ones are called for, except perhaps salads. But even then dried mushrooms would taste good crumbled up and sprinkled on top for a little crunch.

Mushrooms are so easy to dry. So when my local store had them on sale, I stocked up.

Directions:
To start, DO NOT wash your mushrooms. You can wipe them off gently with a paper towel, but washing them whether for dehydrating or cooking is a no no. It will make them rubbery. Once they are dehydrated and you want to use them, you can wash them then.

OK, now that we got that out of the way, let's get back to the mushrooms.

Slice your mushroom about 1/4 inch thick. I bought the pre-sliced ones because I thought it would save time but I found out that there were quite a few I needed to slice smaller anyway.


Lay your sliced mushrooms on one of the trays of your dehydrate. Repeat. Repeat. Repeat until all of your trays or full or you run out of mushrooms. Turn on your dehydrator and let mushrooms dry for about a day. Mine were done after about 14 hours. I put my trays in after dinner, rotated them before I went to sleep and dried them overnight. They were done when I woke up.

Look how much they shrink down. You can tell your mushrooms are done when they are brittle and snap easily between two fingers.
Place in an airtight container. If you have oxygen absorbers your could put one in with it. You don't have to put them in a bottle but they won't get broken this way. This quart jar holds the mushrooms from two 8 oz. containers of fresh mushrooms.

Store these in a cool, dark place for 6-12 months. You could also extend the life of your mushrooms by freezing them from this point.

To Use:
Wash, then add to recipes that will be cooked for at least 20 minutes. Otherwise, soak in liquid (hot water, broth or wine for added flavor) for an hour or 2 before using. 

Tip:
You can also eat these plain like chips. For more flavor, sprinkle with seasoned salt before drying. They have a really nice crunch and earthy flavor which your kids will love.

How to Make Healing Turkey Bone Broth

Mmmm wasn't Thanksgiving dinner delicious? I have to say that I stuffed myself thoroughly and enjoyed every minute. Mashed potatoes and gravy are usually my favorite dish but this year my new sister-in-law made the best stuffing I have ever tasted. I had 3 helpings!

Even with how good the Thanksgiving meal is, I still can't eat the same dish day in and day out. But there is always so much food left over.

Being provident means to put all of your resources to use and let nothing go to waste. One of the things I wanted to try this Thanksgivng was to make my own turkey stock and can it for my food storage. Since it is a low acid food it needs to be pressure canned.


Any kind of stock is easy to make but pretty time intensive. Get started early in the morning and you will enjoy the delicious aroma that fills your house all day.

Ingredients
Turkey Carcass- body, wings and legs,
3 Celery stalk ribs with leaves still attached
3 Carrots, unpeeled but with the tops cut off
1 Onion, quartered with the skin still on
3 Cloves of garlic, whole
6-8 Peppercorns
2 tsp Salt
2 tsp dried thyme
1 tsp dried sage
1 bay leaf

Directions
1. 

Gather your left over turkey carcass, wings and legs. Strip all the good meat off and save it for later. Throw the carcass in a stock pot with all your vegetables. You may want to break or chop your carrots and celery in thirds to help them fit better. Make sure they are washed really well but not peeled.


 Sometimes I just use the ends of my celery instead of the long ribs. That way you can use the ribs for something else and the ends don't go to waste. Be sure to add the leaves too. They add great flavor.

2. Fill the stockpot with enough water to cover everything. Turn stove on to med-high heat.

3.

Gather your seasonings and make a bouquet garni (boo-Kay gahr-NEE). That is just a fancy word for a little bundle of herbs and spices tied in cheese cloth. I didn't have cheese cloth but I did have a ton of coffee filters laying around so I used one of those instead. Make sure that it is tied well before tossing it in the pot. The herbs are kept separate so that your broth will stay clear.


TIPS for clear broth:
  • Watch your broth. As it heats, scum/ foam will start floating to the top. It's not bad if you leave it in, but it will make your broth cloudy. If you want, skim it out of your broth as it floats to the surface. Sometimes I care and sometimes I don't.
  • If you want clear broth, DO NOT LET YOUR BROTH BOIL. If your broth is allowed to boil then the scum and fat that floats to the top will get reincorporated into the stock before you have a chance to skim it.

4. Let your stock simmer between 4-8 hrs skimming the fat off as it rises to the surface. The longer you let it simmer, the more flavor will come out of the bones and the better it will taste.

When it is done simmering, remove all the bones, vegetables, bouquet garni and strain your broth. You can either use it right away, freeze it or can it.

I kept a jar out to use right away for turkey soup and decided to can the rest.

Pressure Canning Directions
  • Fill clean, quart-size mason jars to within a 1/2 inch of the lid with broth.
  • Screw on some heated lids and bands.
  • Arrange jars in pressure canner so that none of the jars are touching.
  • Fill canner to water line
  • Put on lid and process according to your canner's directions with venting, pounds of pressure for altitude and time. For me it was 13 lbs of pressure for 75 minutes since I was using quart jars.
  • Once processed, set jars aside to cool before dating your lids. Use your stock within 1 year.
Now you have an awesome stock to make turkey soup. If you don't want to make soup, you can use it when you make rice or other grains instead of water. Bone broth has so many healing properties, some like to just drink it plain. I would add more salt though to taste. Click here for my Beef Bone Broth recipe.

How to Can Ground Beef

I've been so busy that I haven't felt like posting lately. I have been canning though, I assure you. I've been keeping my eye on the price of ground beef for a while now and finally one of my grocery stores had it for $1.49/lb.
I hadn't ever canned ground beef before but I was looking forward to it since my chicken turned out to be so easy. 

Let's get started
Prep work. 
  • Make sure your jars are clean.
  • Start warming your jar lids on the stove. Do not boil, you just want the rubber rings to be gummy.

1. Get your meat. 
Usually you want to get the leanest meat you can. Canning it makes it super moist so it's a great way to use the less expensive cuts of meat and still have them be really juicy. The stuff on sale at my store was only 73% lean though so I made some alterations to the precooking process.

2.
Working in batches, brown meat. It took me about 3 batches to brown 5 lbs. I only did 5 lbs at a time because I changed the recipe for the next 5 lbs. And it is way less intimidating that way.

You don't have to brown your meat all the way, it's just for texture when you open the can. Some people don't like it really soft so the browning gives it some definition. As my meat was getting done, I would drain it, then stick it in a stock pot with a little water on low heat to keep it warm. 

Also, here's a little trick I learned about browning ground beef in Chemistry. If you stick a little water in the pan while it browns, the fat and the water don't like each other and the water keeps the fat from reabsorbing into the meat. Sticking the meat into the stockpot works the same way. That is why I wasn't too worried about using a fattier package of ground beef than usual. 

3.
When each batch of meat is almost done, dump some onions in the pan to cook a bit. You don't want them in there too long because they have enough time to cook in the pressure canner. You just want to mix them evenly in with the meat. I used about 1/2 and onion per pound of meat.

4.
Line up your clean jars and using a funnel, carefully spoon your meat into the jars. About 1 lb of beef fits into each pint sized jar. You need about 1 1/4 inches of head space because the ground beef won't expand like the chicken did since it is already cooked.

5.
But, because I'm not putting the meat in raw like I did the chicken breasts, the meat won't make enough of its own juice so I need to add some. This is some of the water from the stock pot that held the beef. It turned into a mild beef broth that I used to fill my jars with. I just used my gravy separator (which by the way, I love!) to make sure I didn't put any fat back in. Fill the jars to cover all the meat, keeping in mind your head space. As you pour, take a rubber (or non-metallic) spatula and work out any air bubbles that might be in the meat.

Option 2. 
On my second batch of ground beef, I used tomato sauce to fill my jars with. These jars I'm planning on using in spaghetti, sloppy joes, chili or anything that I would normally end up putting tomato sauce in anyway. This way the meat is already flavored. I watered it down by a ratio of 1:1 to make it easier to pour.

6.
If you want your meat seasoned a little bit more, put 1 tsp of pickling salt in each pint. The flavor will mix as it is in the pressure canner. Make sure only to use pickling salt. Regular table salt will make your jars turn foggy. You could also just put 1 tsp of  beef bouillon in instead.

7.
Make sure to wipe the rims of your jars really well with a hot, clean towel. You don't want any grease on the rim to prevent your lids from sealing.

8.
You are ready to put the lids on the jars. Use a magnetic lid lifter to avoid burning yourself. I've don't this one too many times when trying to just use a fork to lift them.


9.
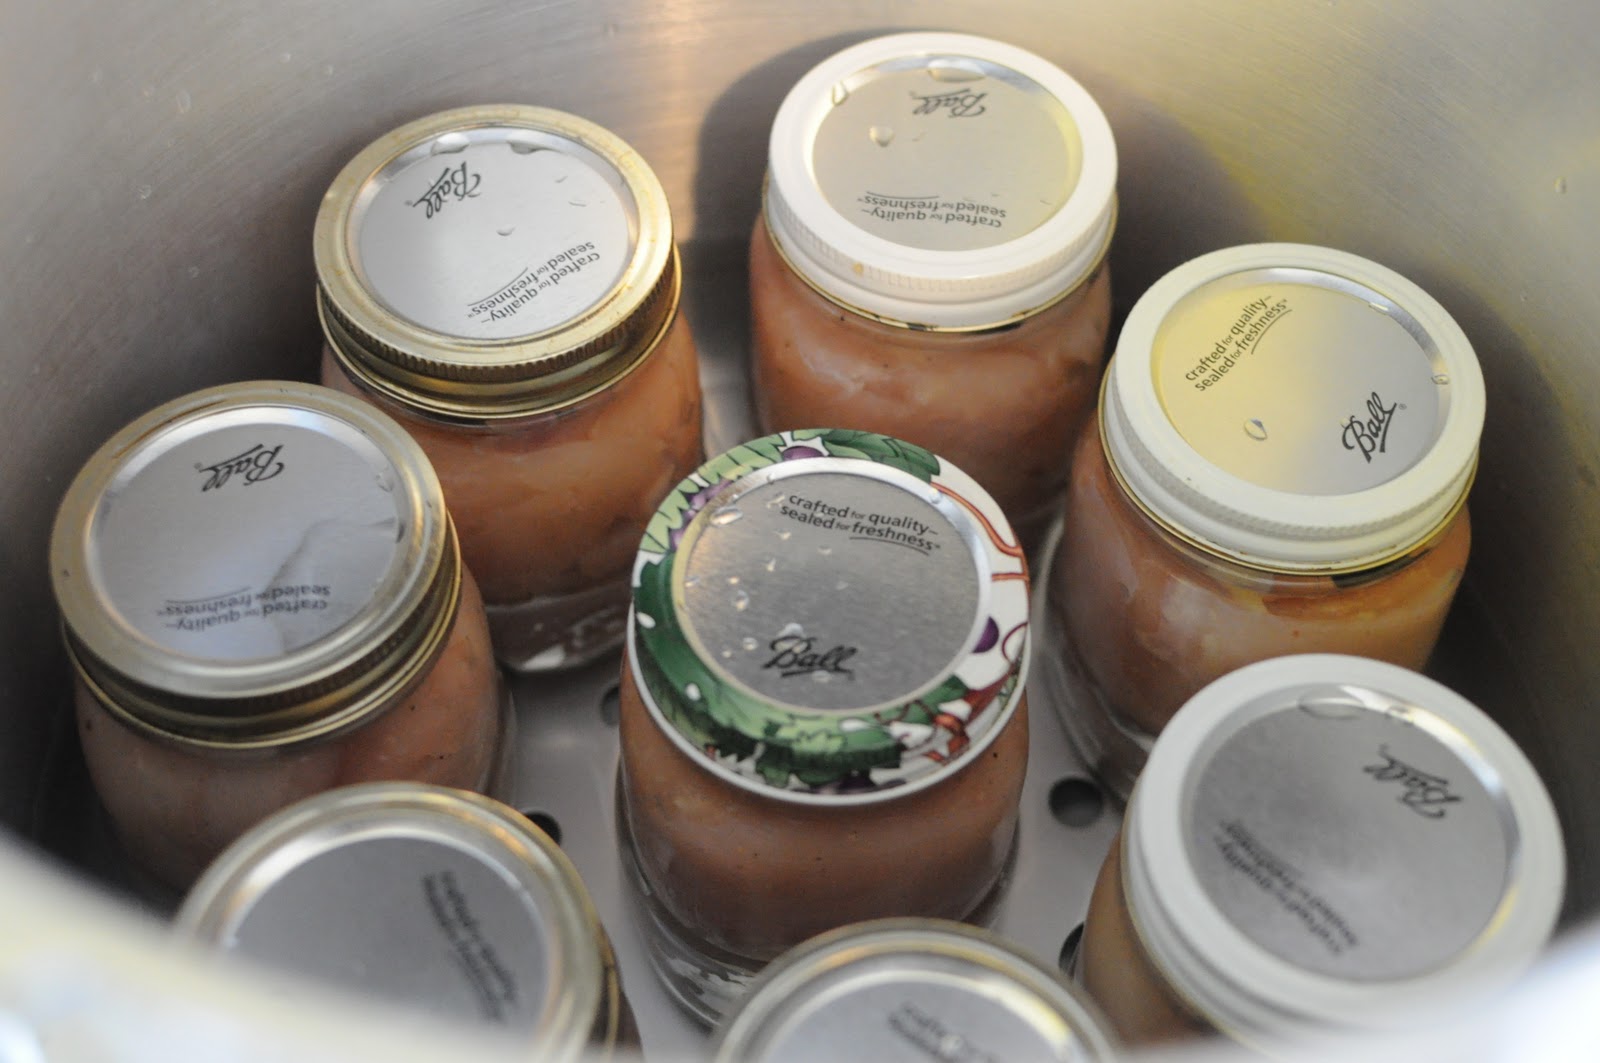
Put your jars in your pressure canner, and follow the instructions that came with it for pressure and timing based on altitude. This is the Presto 1781 23-Quart Aluminum Pressure Cooker/Canner. For ground beef pints at my altitude I used 13 lbs of pressure for 75 min. For a step by step process in pressure canning check out my post on canning chicken

10. Ta Da!

So they might not be the prettiest looking jars of food, but believe me, it tastes fantastic. The tiny bit of congealed fat at the top is totally normal. I made tacos out of my first jar and no joke it was exactly like the taco meat you get at Taco Bell. Mmmm so good! I'm very happy with how it turned out. 

Don't forget to label your jars! This meat will stay good for a year or longer. If you have a jar that didn't seal, just stick it in the fridge and use it soon. It's fun to see how your meat turned out anyway.

As with any canned meat, the USDA recommends boiling/ heating the meat for 10 minutes once it is opened just to make sure all bacteria is killed.

Ground beef is one of the things I'd been wanting to try canning for a long time. I'm glad I finally did it and am happy to post about it. I'd love to hear some of the things you've been wanting to try too. 

Happy Canning

How to Can Homemade Grape Juice

One of my earliest memories is of my preschool teacher taking my class on a field trip where we made grape juice. I can't remember much about it except for the divine smell of the ripe Concords hanging on their vines and the satisfying experience of being able to sample the sweet product of our efforts. I will never forget the rich flavor and the sweet taste left on my tongue.

I've kept this memory for over 20 years never again experiencing grape juice that could compare to that of my preschool field trip. My husband thinks it's sad that I can remember things like this. But for some reason food leaves a lasting impression on me.

Imagine my surprise 2 years ago when I was coming back from a walk in the new neighborhood my husband and I had just moved into when I got a whiff of it. I looked around, took a few more deep breaths of the crisp autumn air and I was certain. 

Grapes, and not just any grapes, my preschool grapes were somewhere nearby. A little investigation proved that they happened to be along the fence of my new next-door neighbor. This was the beginning. I had never canned anything before, but at that moment I knew I needed to have grape juice from those grapes. 

Over the next few weeks I began hatching a plan to convince my new neighbor to give me her grapes. Luckily, it didn't take any master planning. One day, I mentioned how great they smelled. She told me there were more than enough for what she wanted so would I like the rest? oh and would I like her to teach me how to can the grape juice too? Music to my ears. 

So I jumped right in, got some old mason jars from my mom and the result was everything I could have wished for. Smooth, rich, sweet chilled concord bliss.

3 years later, I still can hardly wait for the first frost to come so the grapes will be ready to pick. My mom even caught the bug last year after tasting the end result. (The first year I felt like I had to ration my jars but the next year I was less stingy). My mom has always made her own jelly but last summer she drove all over the valley collecting people's unwanted concord grapes and ending up canning over 100 quarts of grape juice!

I recommend starting small. Let's start with one batch. Oh and by-the-way, it is soooo much easier if you can get your hands on a steam juicer. It's possible to make grape juice in a stock pot, but then you have to worry about straining the juice through cheesecloth. With a steam juicer, it does all the work for you.

Go pick some grapes, you might be surprised how many old neighborhoods have grapes that no one wants. So ask around. If all else fails, you can buy some. The key to good grape juice though is to only use Concords. The lighter red and white varieties just won't provide the flavor needed to make a yummy juice they will turn out too sweet.


Wash and de-stem the grapes. Put as many into the steamer as will fit with the lid on. For the steamer I use, one full batch will make enough juice for 5-6 quarts.


Assemble steamer. Turn your stove to high heat and steam the grapes. The skins will begin to burst and release their juices.

You can check how much juice you have buy lifting up the top portion of the juicer to see how high the juice is in the reservoir.


Start heating your new lids and sterilizing your bottles. Do not boil your lids, you just need to soften the gummy seal by warming them up. The grape steaming process takes from 30 min to 1 hour.

Line up your sterilized bottles so they are easy to get to.

Once your juice is almost to the top of the reservoir and you are ready to fill your jars, carefully place a bottle with a funnel one under the spout hose and release the clamp. Obvious but necessary warning: the liquid coming out of the steamer is boiling hot. Hold the jar with a towel so you don't burn yourself as the bottle fills up. Leave 3/4- 1 inch head space. (I usually dump my first jar back into the steamer over the grapes. I think it helps the top layer of grapes breakdown and evens out the flavor.)

Wipe the rim of your jar with a wet, hot rag or paper towel. Grab on of your warm lids with a magnetic lid lifter and place on jar with metal band.


Screw on until finger tight. You don't need to, nor should you go crazy and try to screw them on as tight as they will go. Finger tight is fine. Set aside to cool and repeat til all juice is gone. You can strain the remaining grape flesh over a bowl and get almost a full quart before tossing the pulp in the garbage. You can add that juice to your next batch and can it with those bottles, or you can heat to boiling and can it individually if you are only going to make 1 batch.

Mmm... don't they look delectable? Stick one in the fridge right away and you'll know what I mean. Sweet childhood memories just as I remembered.

How to Can Chicken

I love canning. I love that I know exactly what is going into the food I feed my family. And, I love making use of a good deal. I don't know if it is just the accountant in me, but I love knowing that I am saving money. 

One of my sisters-in-law invited me to a home canning presentation over the summer where I tasted home-canned meats for the first time. They were so good. So juicy, great flavor. Since then, I've been wanting to try canning meat. I was a little intimidated by the fact that you have to use a pressure canner. Water bath canners cannot get hot enough to kill all of the bacteria in the food. 


I put it off until one of my grocery stores had a deal on boneless, skinless chicken that I couldn't resist. I ended up buying 15 lbs.

I was surprised by how easy it was. You need to follow the instructions that come with your pressure canner. They can vary slightly, but sometimes it's nice just to see the process.

The nice thing about canning meat is that you can put it in the jars raw. They cook in the pressure canner for so long that there is no need to cook beforehand.

Directions
Prep work. 
  • Make sure all your mason jars are clean. Technically, you don't need to sterilize them because the pressure canner cooks them at such a high temperature that they get sterilized then. I still sterilize them beforehand though, I guess I'm just paranoid.
  • Warm your jar lids in water to get the gummy rings softened. Do not boil.

1.
Get your chicken and cut off any visible fat. You can put the chicken in as whole breasts but I wanted to slice mine into tenders. That way I figured I could reduce air bubbles. I sliced my chicken and seasoned with a little pepper as I went. You don't need to season them if you don't want to though.

2.
Stuff your raw chicken into clean mason jars. 1 pint jar holds about 1 pound. Leave 1 1/4 inch head space. The chicken will release its juices as it cooks and you don't want it to touch the lids or it might make them not seal.

               
I put chicken base Better than Bouillon in my jars. It just intensifies the flavor of the chicken as it cooks.You can use a bouillon cube or powder instead if you want.

3.
Wipe all your jars with a hot towel to remove any chicken juices that might've gotten on the rim. Use a magnetic lid lifter to lift lids out of hot water and place on jars. Screw rings on til finger tight. They have to be able to release some air so don't screw them on ridiculously tight.

4.
Place jars on rack in the pressure canner making sure that they don't touch. They need to be on the rack so they don't touch the bottom of the canner directly and get too hot. Follow pressure canner instructions for amount of water to fill. Usually there is a line on the canner that shows you how much. About 11/2-2 inches.

5.
Place lid on your pressure canner following directions from manual. I'm using the Presto 1781 23-Quart Aluminum Pressure Cooker/Canner. Turn to high heat. Vent steam for 10 minutes. Place on vent block and bring to pressure depending on altitude. Once pressure is reached cook for 75 minutes for pints. Slowly turn down the temperature as it builds pressure until it is just right. You need to babysit the canner to make sure that the temperature doesn't drop below what you are supposed to can it at or you will have to bring it to pressure again and start the time all over. It isn't as hard as it sounds. You can find a setting on your stove where it will hover around the right temperature without building or losing pressure. For me, it was on 4. If you have a gas stove it is much more precise.

6. Once the 75 min are up, remove the canner from heat and let it slowly release pressure. You do not need to do anything, this happens naturally as it begins to cool. Once the pressure gauge reads zero and the pressure indicator drops, you can take off the lids, and remove jars. Place them on a towel to cool. 

7. Don't forget to label your jars. Canned chicken will last for over a year, but I doubt you will be able to wait. I made Chicken Enchiladas with the chicken and my husband without knowing that I used my canned chicken declared them my best yet! He was nervous about me canning meat because he was afraid of how it would taste so I didn't tell him til he'd already eaten it. Tricky, tricky, I know.

ENJOY!

When I first opened the can, I tasted it to see how it turned out. It smell and tasted just like the canned chicken you can get at the store. I buy that usually just for making chicken salad sandwiches but with your canned chicken, you can use it to make anything you usually need shredded chicken or chicken chunks for. And it is so easy to shred. I basically just pressed my fork against it and it fell apart. 

It is recommended to heat/boil canned meats for 10 min after opening just to make sure that any bacteria is killed. If you are going to use it in a casserole or other dish that needs to be heated anyway, I don't bother with preheating, I figure it gets hot enough for long enough while cooking.